How to Hide Local Subtitles on macOS
If you often watch videos with embedded or local subtitles on your Mac, you may have noticed that macOS automatically displays them—even when you don’t need them.
Whether you’re editing a video, recording a demo, or simply prefer a clean viewing experience, here’s a simple and effective way to hide local subtitles system-wide using macOS’s built-in caption settings.
Step 1: Open the Captions Settings
- Open System Settings.
- In the search bar at the top, type “Captions.”
- Click on Captions in the search results to open the caption customization panel.
Step 2: Create a Custom Caption Style
- Click the “+” button to create a new caption style.
- A configuration window will appear (see screenshot below).
Set the options as shown in the image:
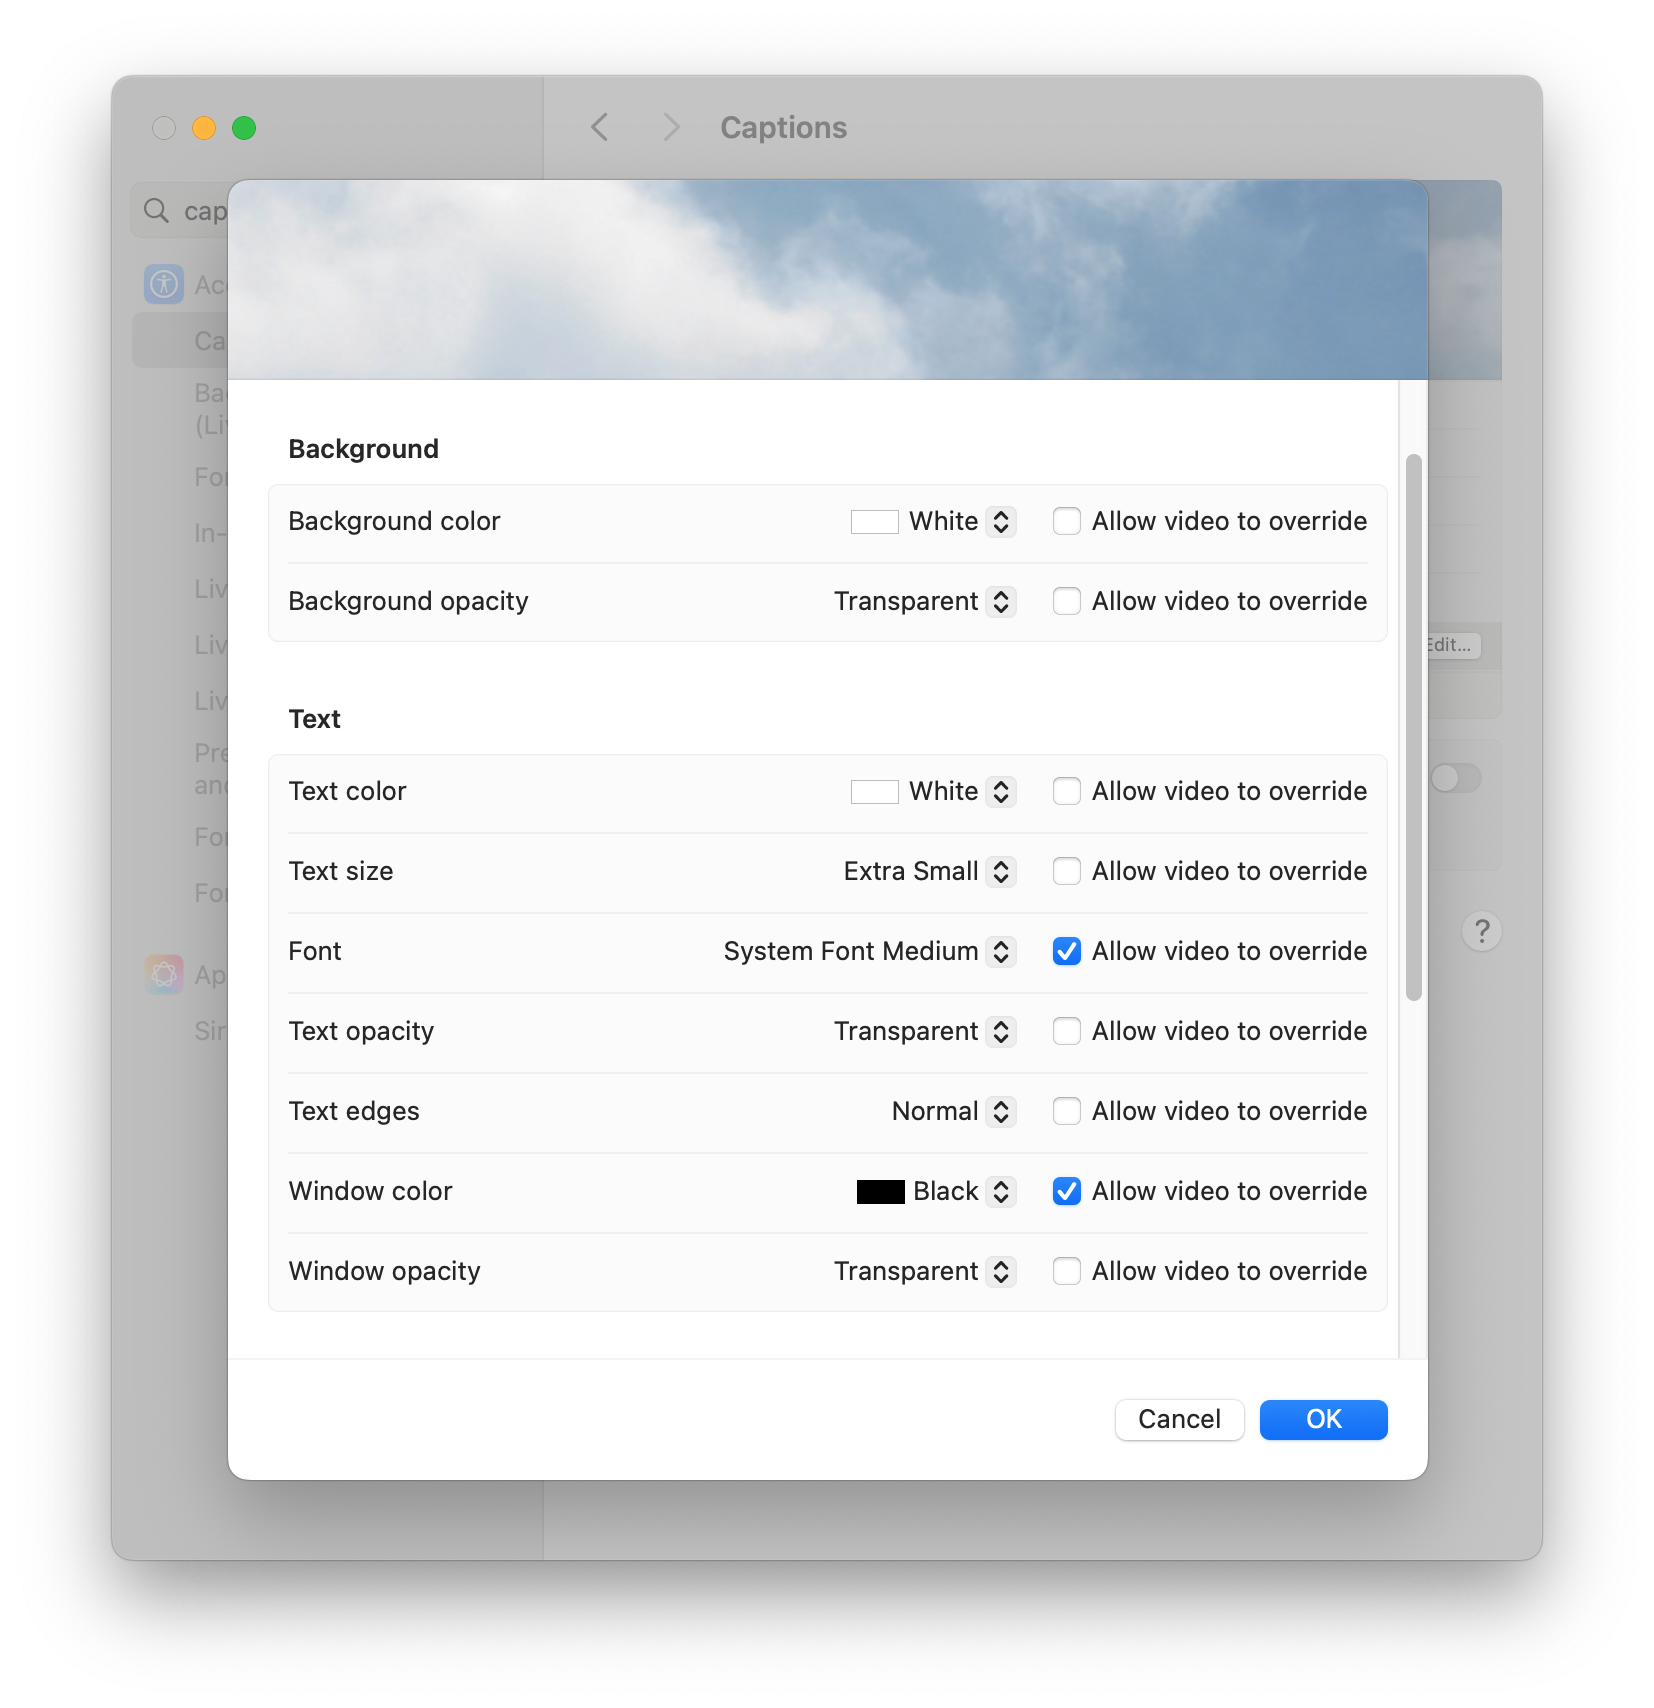
⚙️ Recommended Settings (to Hide Subtitles)
| Setting | Value | Description |
|---|---|---|
| Background color | White | Keeps the area neutral and blends with most video backgrounds. |
| Background opacity | Transparent | Ensures the subtitle background doesn’t block the video. |
| Text color | White | Matches the background, making text nearly invisible. |
| Text opacity | Transparent | Completely hides the subtitle text. |
| Window color | Black | Default value; doesn’t affect visibility. |
| Window opacity | Transparent | Keeps the entire subtitle window invisible. |
| Allow video to override | Unchecked | Prevents video players from changing these settings. |
Step 3: Save and Apply
- Double-check the settings above.
- Click OK to save your custom caption style.
- Play a video again — your system captions should now be completely hidden.
✅ Summary
By creating a new custom caption style in System Settings → Captions → “+”, and setting both the text and background opacity to Transparent, you can completely hide local subtitles on macOS and enjoy a distraction-free viewing experience.